Completing a Complete & Sign Document Task
In brief
A Complete & Sign Document task requires you to enter information into a document via marking it up up. The assigner may have allowed you to freely mark-up anywhere you see fit in the document, or they may have selected specific areas. You may be required to provide text as well as a digital signature, which you can create within Exaprojects.
Required permissions
Can view their own tasks
Opening the document to sign#
To open the document you need to complete or sign, please navigate to Tasks and find the relevant task. Note, you can complete Complete & Sign Document tasks from both the 'List view' and the 'Table view'.
Alternatively, if you've clicked the link in your task assignment email, you should be taken directly to the task.
List view#
Once you've found the correct task, you will need to open the document. You can do this by clicking the blue 'Complete document' button. Alternatively, if you
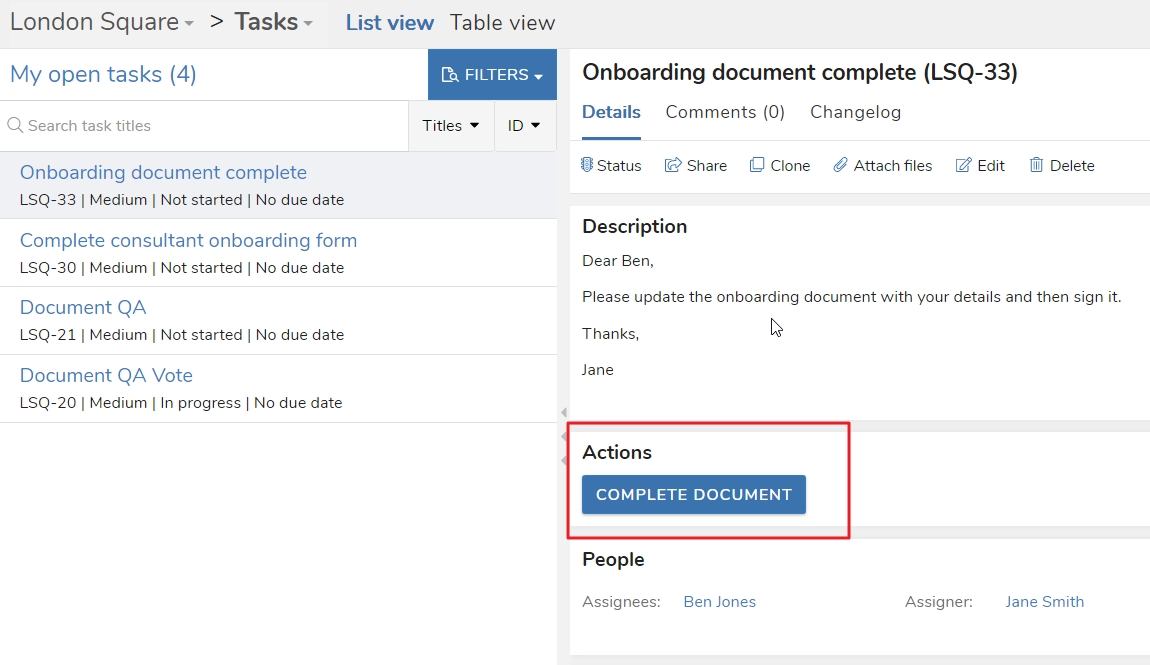
Table view#
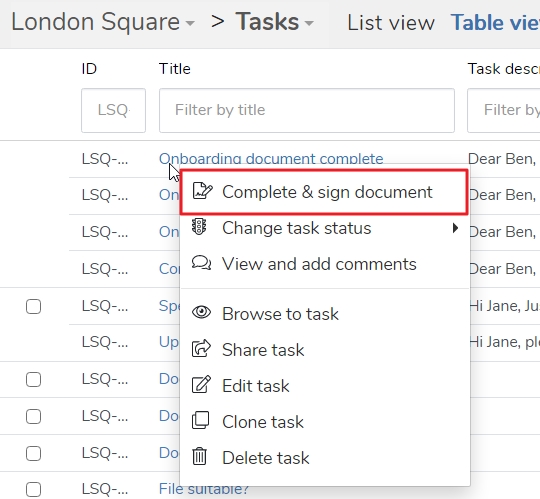
Once you've identified the task, click the task title in the 'Title' column, or right click the task row. A menu will appear in which you can select 'Complete & sign document'.
Document mark-up#
The document to complete will then load in a new tab. If you haven't yet saved a signature, and a signature is required to complete the document, Exaprojects will prompt you to add your signature.
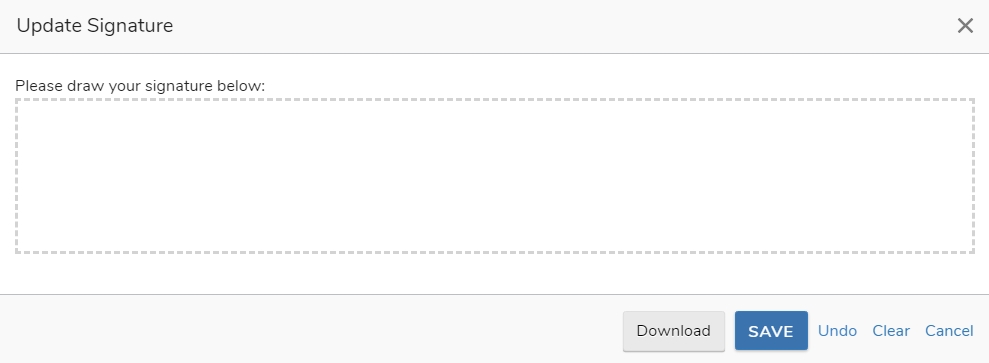
To draw your signature, simply click, hold and move your mouse. Once you've drawn it, click 'Save' to save it. The page will then refresh.
Your next steps are then dependent on whether the assigner has given you specific locations mark-up, or has allowed you to add mark-ups to anywhere on the document.
Specific locations#
You'll immediately notice the red boxes on the document - these indicate the places you have to add text, or enter a signature.
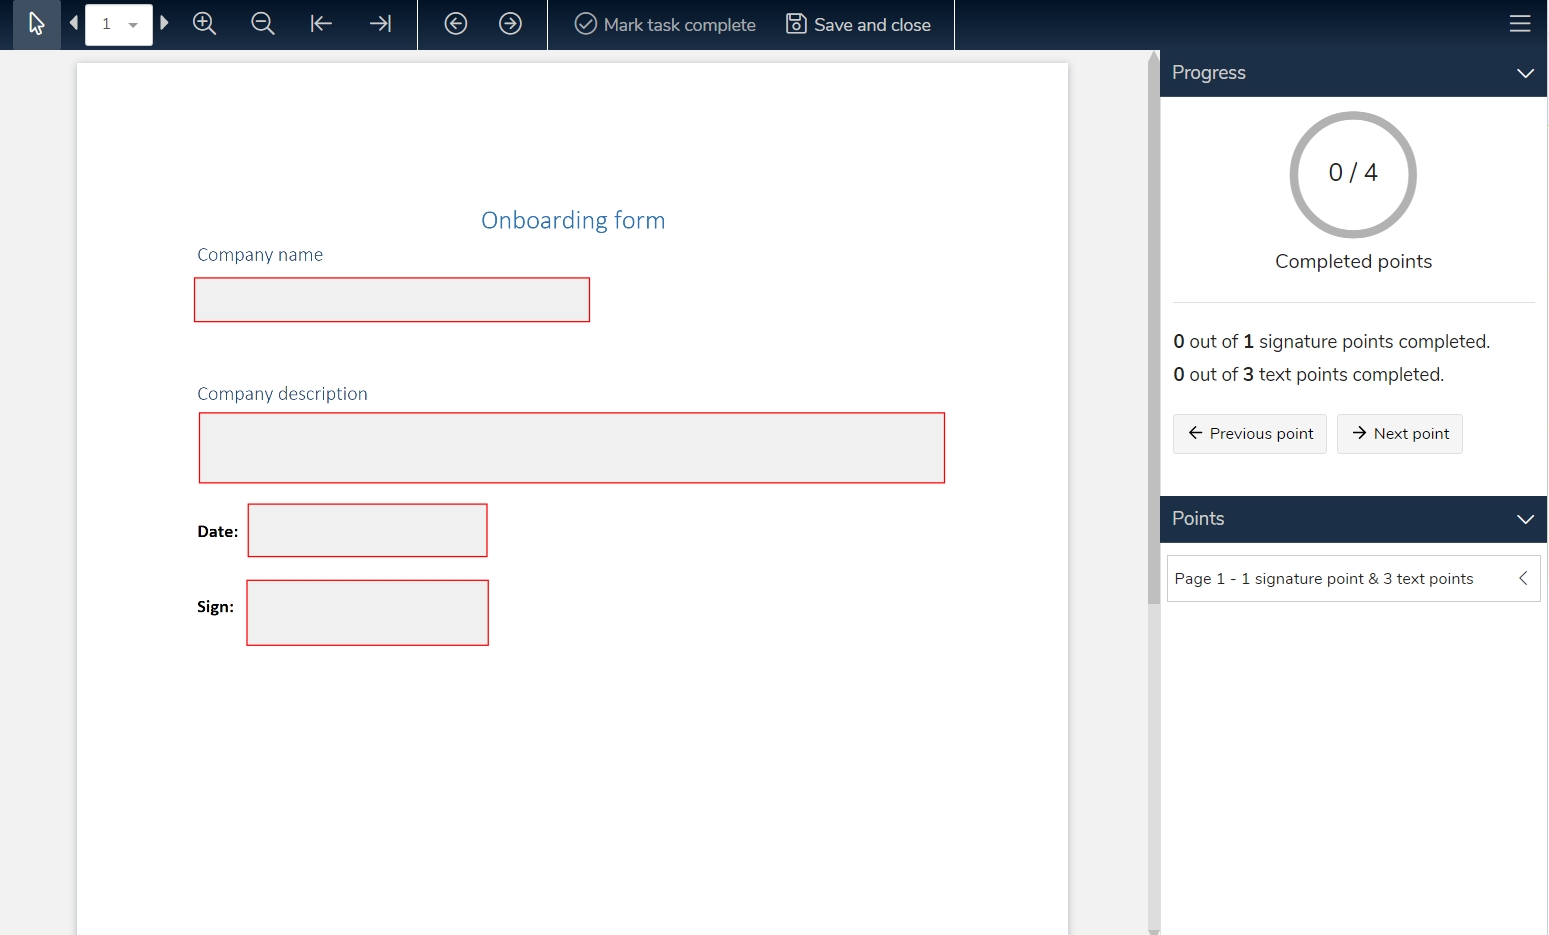
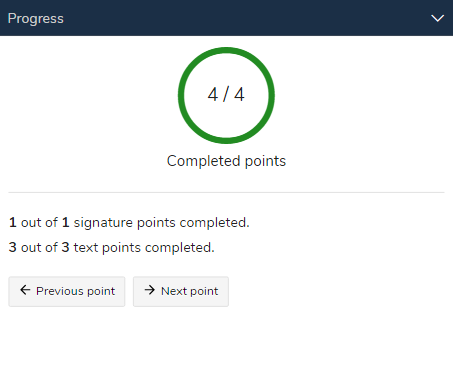
You'll also notice the panels to the right - there's the 'Progress' panel which tracks the points in which you need to enter data. Note you can use the 'Previous point' and 'Next point' buttons to toggle through them.
Beneath is the 'Points' panel. If you click the 'Page' toggle, it will list the points you need to enter data. If you click an entry, it will take you to that point.
Note that you can collapse and expand these panels by clicking the panel title.
If you double click a text-entry point, it will open a window in which you can provide text. On the other hand, if you double click a signature point, it will automatically add your signature for you. You'll notice as you complete the points, the 'Progress' panel updates.
You'll know when all mark-up points have been completed as the 'Completed points' tracker will turn green. You can then click 'Save and close'.
Specific location mark-up controls#
At the top of the page, you'll also see the mark-up controls.

From left to right these are:
- 'Select' - click this icon to enter select mode. This means different mark-ups can be selected. You won't need to use this for specific location mark-ups, but will for any location mark-ups.
- 'Page jump' - use this to quickly jump between pages; either by clicking the left and right chevrons or selecting a page in the dropdown.
- 'Zoom in' - zoom in the document.
- 'Zoom out' - zoom out the document.
- 'Rotate left' - rotate the page left.
- 'Rotate right' - rotate the page right.
- 'Go to previous point' - jump to the previous point that requires completion.
- 'Go to next point' - jump to the next point that requires completion.
- 'Mark task complete' - this button will be available when you have completed all the required points on the page. It will save your entries and mark the task complete. The assigner will be notified and they will be able to download the document with your mark-ups.
- 'Save and close' - this will left you save a draft of the document, allowing you to revisit the document at a later time.
Any location#
If the assigner hasn't provided specific locations in which to add your mark-ups, then you will need to add your own. Fortunately, the process is very similar to the above.
You'll notice that the mark-up controls have two additional options. 
From left to right they are:
'Insert text' - when selected, you can click on the document to enter text.
'Insert signature' - when selected, you can click, hold and drag to create an area in which your signature will be inserted.
Entering text#
To enter text, click the 'Insert text' button. Then, in the area where you wish to add text, click the document. This will then open up a new window in which you can type your text and optionally add some basic styling.
Entering your signature#
To enter text, click the 'Insert signature' button. Then, in the area where you wish to insert your signature, click and hold to drag out a rectangle roughly the size you'd like your signature to be. This will then insert your signature.
Good to know
If you forget to drag out the rectangle for your signature, it may be inserted as a very small point. If this is the case, simply resize the signature, as explained below. Alternatively, you can delete it and try again.
Moving and resizing points#
With the 'Select' button selected in the controls menu (the mouse pointer on the far left), click the point you wish to change. With it selected, you'll notice that a rectangle appears around it. To move the point, just click and hold and move your mouse in the desired direction.
To rotate points, you'll notice there's a small circle located near the centre of the text, if you click that and hold then move your mouse, you can rotate the text or signature.
Lastly, for signature points, you can click the four corners of the outer rectangle to increase or decrease the size of the signature in that direction. Note that, to resize text, you'll need to edit the text and increase the text size there.
Editing text points#
To edit text points, simply double click the text to reopen the text entry window. You can then make the necessary changes and click 'Update'.
Deleting points#
To delete a point, simply click it and press the delete key on your keyboard.
Navigating through points#
You can navigate through your points using the 'Progress' panel and the 'Points' panel.
Saving#
If you're happy with your mark-ups, click 'Mark task complete'. This will inform the assigner you've completed the document. Note that you won't be able to edit the document again.
Alternatively, if you want to revisit the document at a later date, you can click 'Save and close', this will save your current mark-ups but not mark the task complete.